
This time we’ll be taking a first look at how to introduce exceptional lighting into your scenes with HDRI, or High Dynamic Range Imaging. HDRI is the best way to add lighting to your scene that is as realistic as it gets.
All dynamic range refers to is the fact that even if you are rendering your scene with the widest range of colors, with the best video card, on the best monitor, it will still not have the range of colors and brightness that your eye can detect.
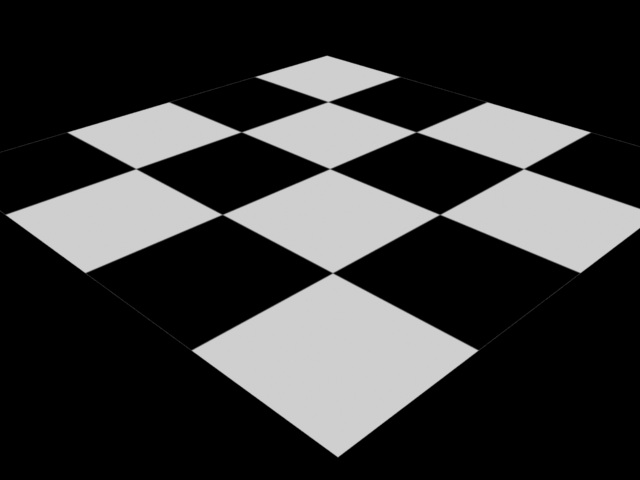
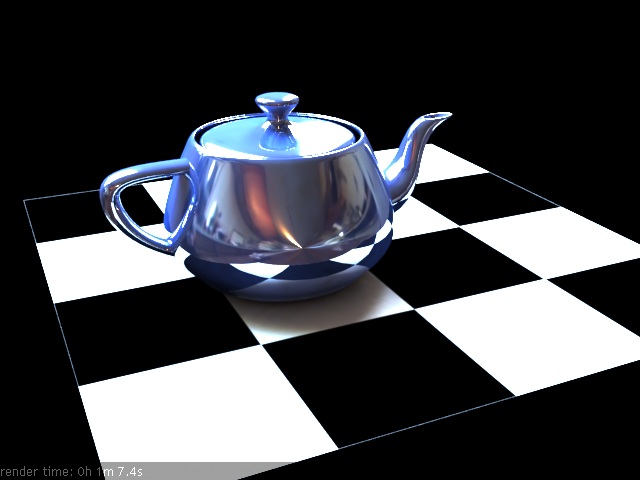
To start, we’ll just insert a plane into the scene and give it a V-Ray material that has its diffuse channel set to a simple checker pattern. I use this pattern because it is the easiest way to see precisely how your objeccts are inter-relating to/with each other and their environment.
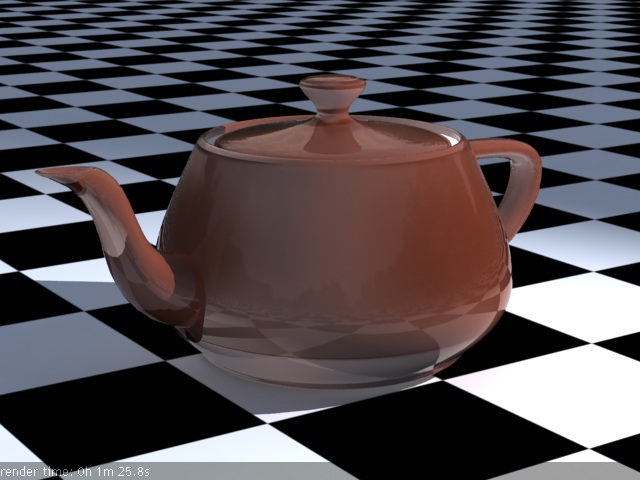
Now we just add a simple teapot, with no particular material. Also, there is default lighting only.

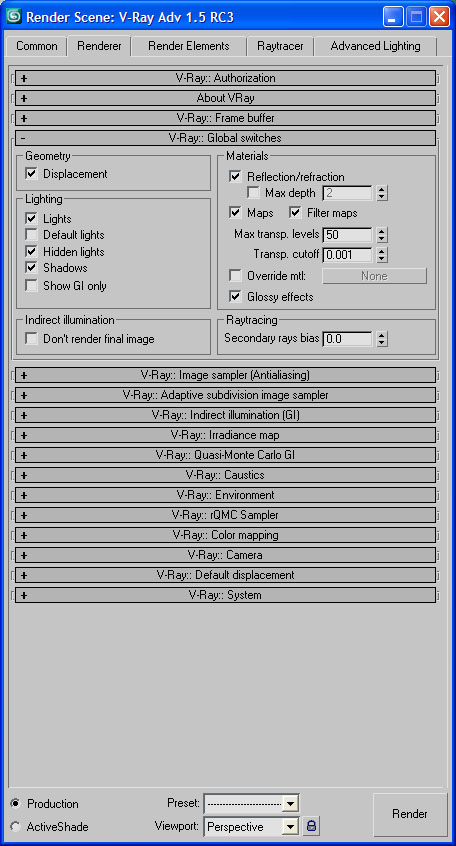
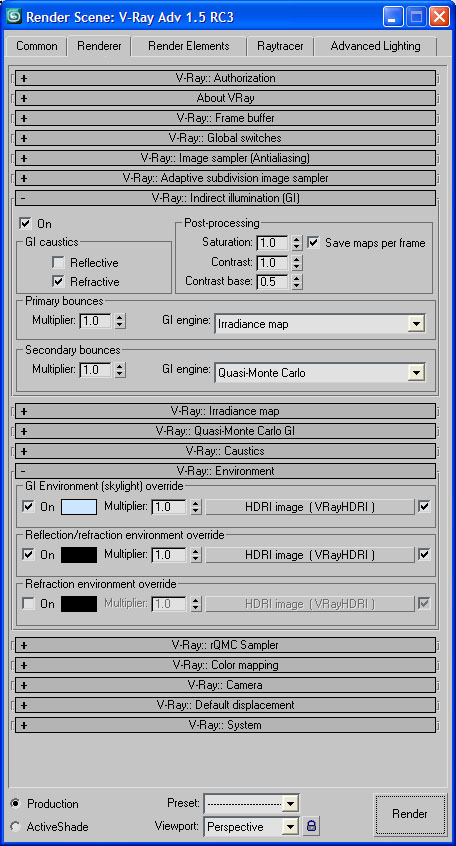
Now go to the Renderer tab in the Rendering settings (F10). Under V-Ray::Global switches, uncheck Default lights. If you render now, the scene is black. We have no added lights, and we’ve turned off the default lighting in 3ds Max. It should be black!
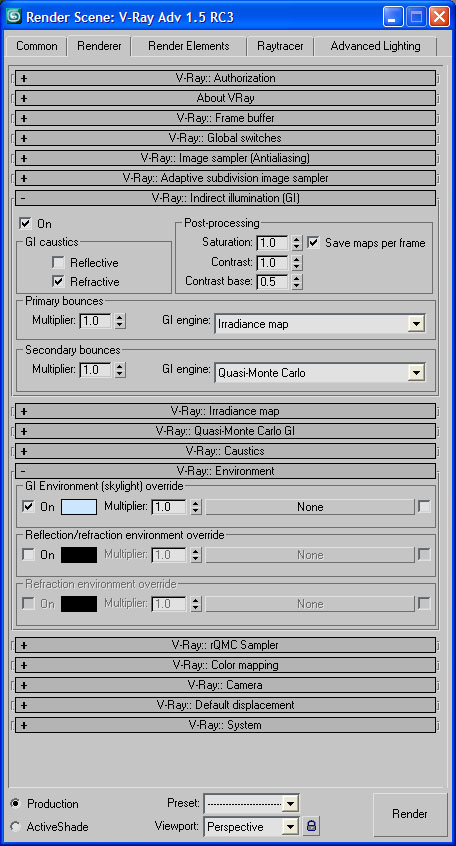
The next thing we do is to add some environmental (non light-specific) lighting. Think of this as V-Ray’s version of 3ds Max’s Default lights, where there are no lights in the scene, but things are illuminated from the environment. It is good to note here that the environment itself (F8) is not used to illuminate our scene in 3ds Max. If you change the environment’s color-or even put an image in-it will have no effect on the scene. Go ahead and try!
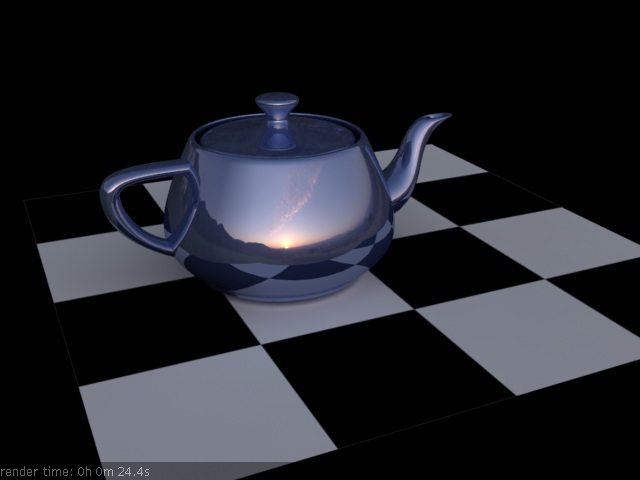
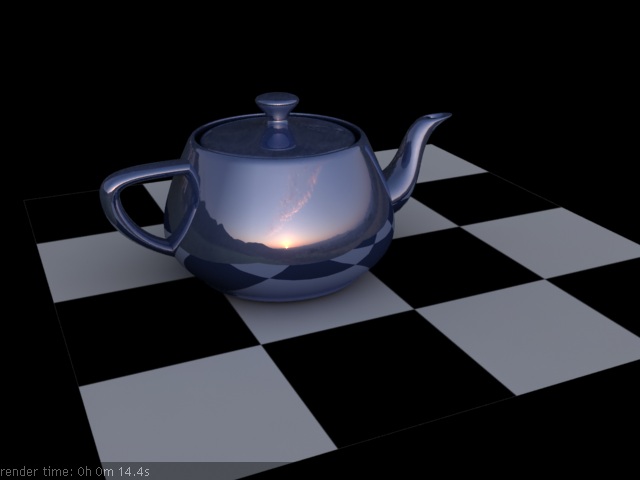
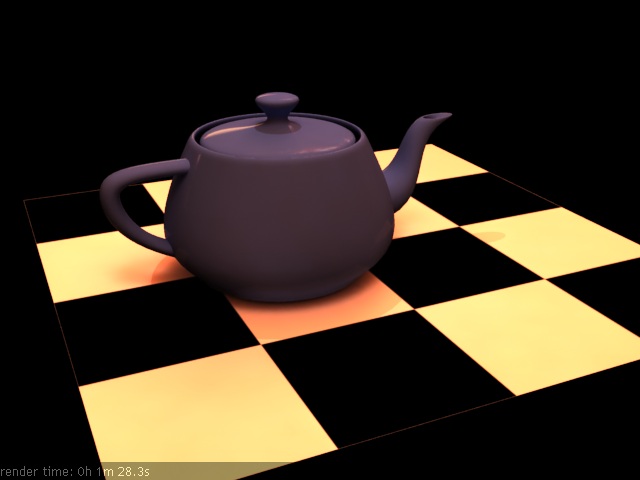
Environmental, or scene, lighting is applied in V-Ray under the V-Ray::Environment rollout. For this scene, we’ll just turn on GI Environment (skylight) override.
This produces:
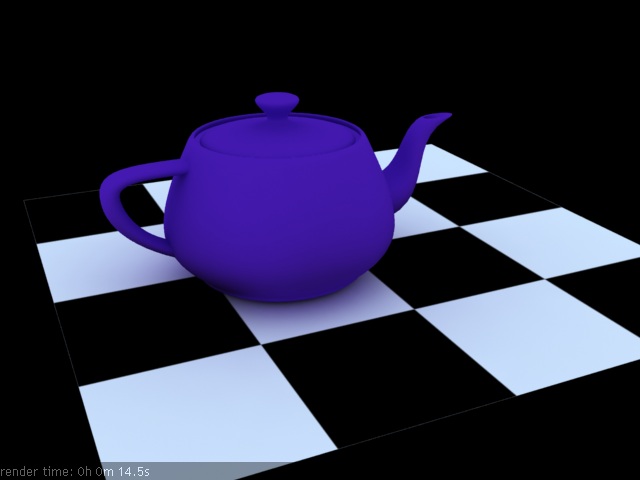
As you can see, already we have a very sophisticated rendering, with just a few basic configuration changes. Notice how we’ve got irradiance, or the blue color refleccted onto the white squares. Likewise, the color of the squares below the pot affect the brightness of the pot itself-just as lights and colors do in real life.
You will notice a light blue color for anything rendered this way with the V-Ray defaults, and that is due to the light blue default color in the GI rollout above. You can naturally change this to mimick your general scene’s color (or even via an image) to more closely approximate the actual environment’s lighting.
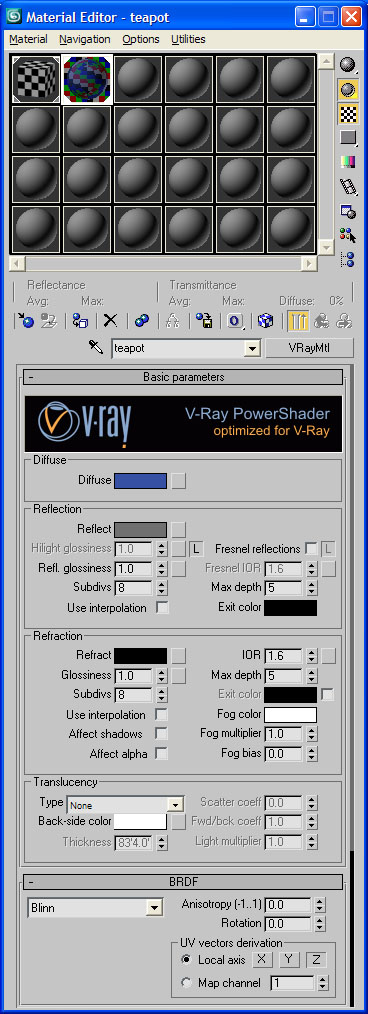
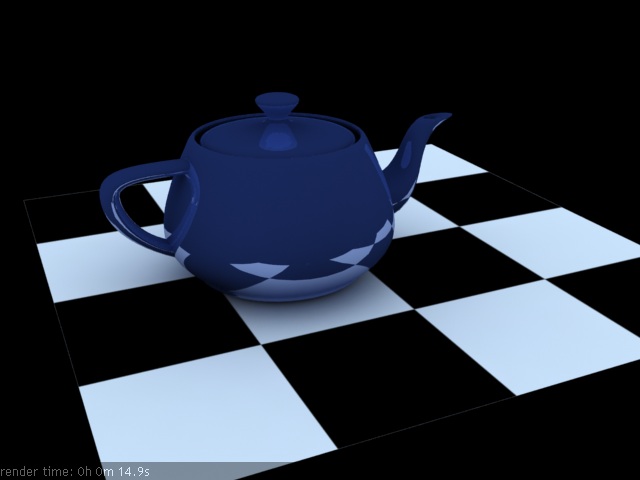
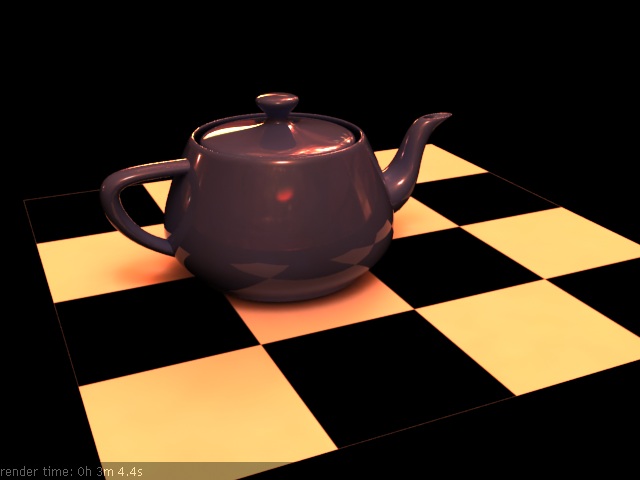
Next, let’s leave things as they are and make the pot itself more reflective, or shiny, so we can more easily see the effect the environmental lighting in HDRI will have. To do this, make a new V-Ray material and make it look like this:
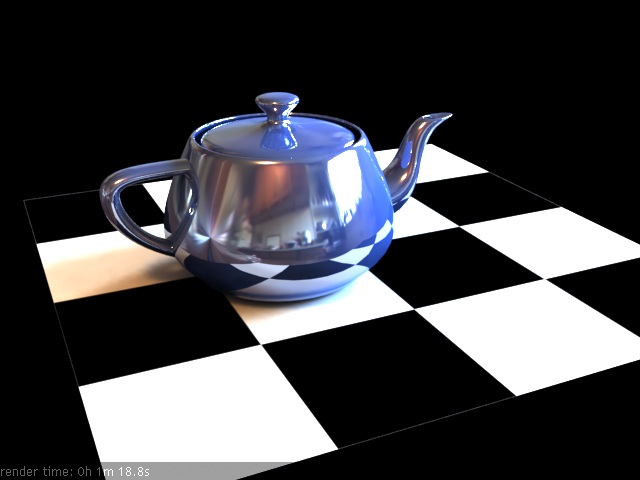
If you apply this material to the teapot and render, you will see:

You adjust the mix of the diffuse color and the reflection with the Reflection -> Reflect color. The more white it is, the more reflective the material. There are other options here for more realism, but for now we’ll just stick to a fast application of HDRI to the scene.
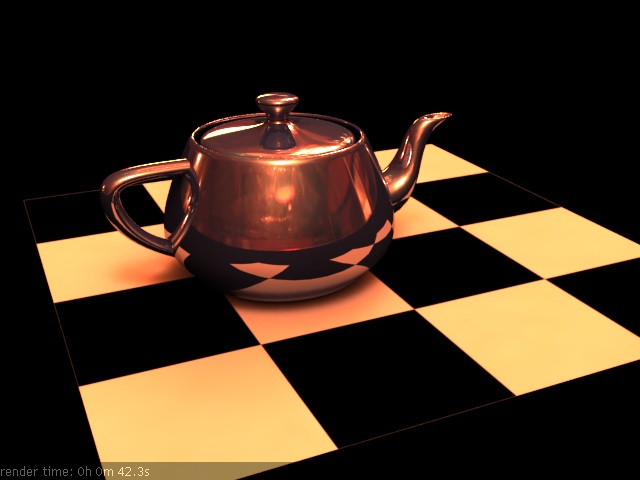
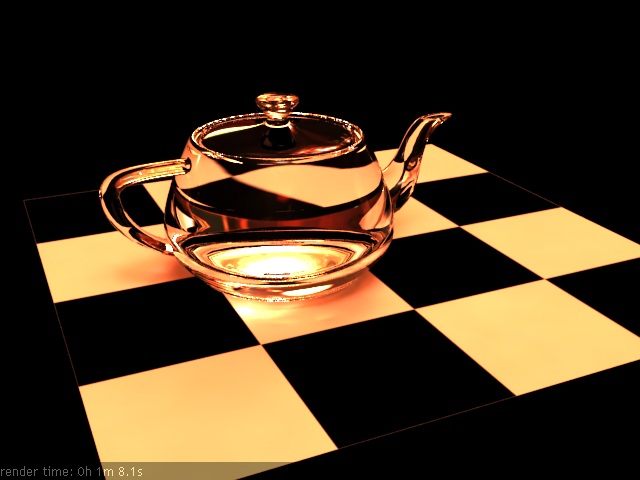
Create a new material in 3ds Max, and make it a VRayHDRI:

Browse for the file you have (must be an HDRI file), and select the file type. I my case, I used a Spherical HDRI. With just the default settings, our simple teapot scene looks like this:
All of these renders are of the same scene, using the same HDRI image. The image on the left is with a Spherical environment HDRI setting, center is a Cubic. On the right, a Mirrored ball.
This last one is using the map as an Angular map:
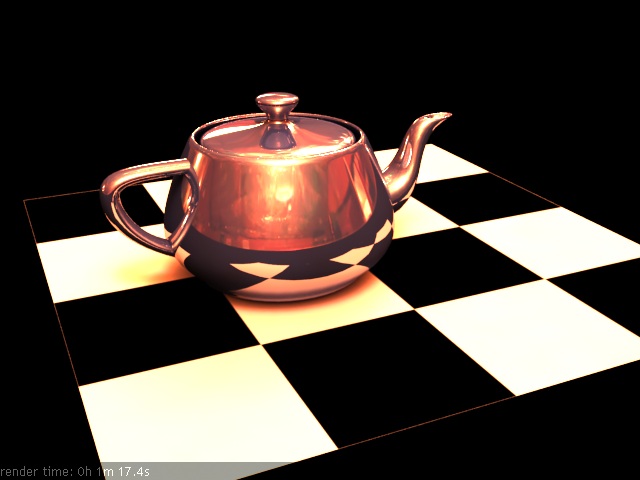
Which kind of HDRI map do you think it is? I’ve included the render times for these so yuo can see the difference in settings. I’m using a pretty slow laptop to write this tutorial, so I know you’re not impressed with the speed! I just want you to see the render times comparatively-using the exact same machine. Here is a sunset render of our simple teapot, using a Spherical environment:

So far, we’ve been using the settings on the left for our scene:

On the right, we’ve ckecked the GI caustics -> Reflective. The results are:
No difference! Reflection calculations make no difference, but look at the render times! We went from 14 seconds to 24. That is a 67% increase in render time. Very significant. So why use it? Well, for just a second, uncheck the HDRI assignment in V-Ray::Environment, leaving the GI caustics -> Reflective unchecked. Lets look at the difference that having that Reflections option checked:

On the right, the reflections are a little brighter. If we had a more complex scene (lots of lights), the difference would be more dramatic. This simple scene doesn’t even have a single light! The render time with Reflection calculations are, surprisingly, 59% more! You’d think that HDRI calculations would take a lot more, but they don’t. If we take GI caustics -> Refractive off, we see:
Can you see what is missing? Now lets use an HDRI image that has stronger colors, setting a different mood:
See how the HDRI image actually makes the teapot look copper colored? The environment is obviously too strong in this case. You’d naturally think that there are 2 ways to approach this:
1. Turn down the reflectivity of the teapot’s material, or…
2. Turn down the intensity of the HDRI
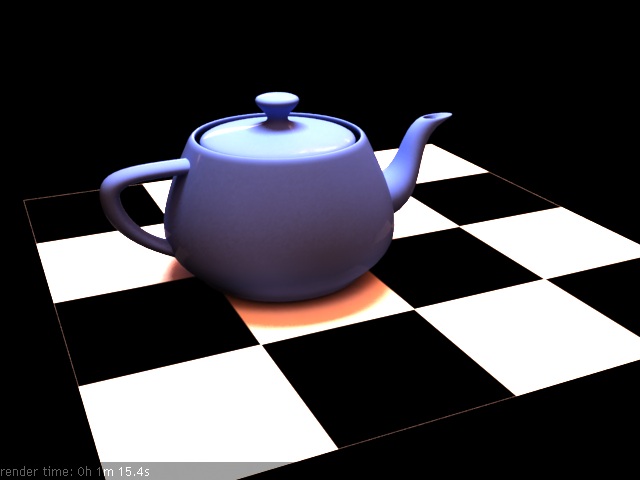
But this isn’t the case! First, here on the left is what happens when we change the teapot material (from RBG all set to 112) to a grey, with R, G and B set to 25 (10%):


In the middle, we’ve put the Reflective portion of the teapot’s material back to 112, and tone down the HDRI material’s Multiplier from 1.0 to 0.5. At right, we doubled it to 2.0. None of this has affectd the reflectivity of the teapot. It still looks so shiny that we can’t tell that under there is a blue teapot! So lets turn down the teapot’s material so that reflectivity is low enough to be able to see the blue color. Here we have the Reflection channel set to a grey (13, 13, 13):

Now lets go back to the object’s material, and just select Fresnel reflections:


Not the result we expected at all! Look at how the reflections off the pot are brown (from the HDRI image), and there is no radiosity transferred from the pot to the plane. The next thing to do is now adjust the reflectivity of the teapot’s material. Now the reflect is set to 29 from 13. On the left is a straight render without GI reflective caustics. On the right, with:


So this is all fine as we haven’t added any lights into our scene. If we add lights, using the HDRI images as we have so far, we create a very interesting problem:
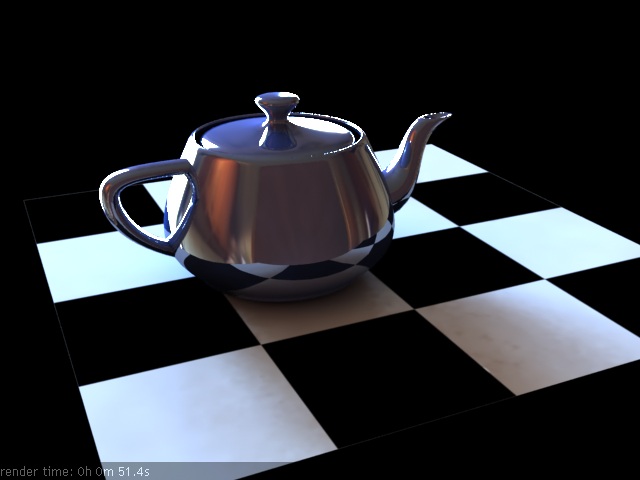
You can see that with this standard v-ray light (plane) sitting over the teapot, the pot is illuminated fine, but where there is a shadow from the light (under the pot), we see the brown light from the HDRI (this is why I chose a strong colored HDRI image for this example). This is completely unrealistic-and this is with both reflective and refractive caustics enabled!
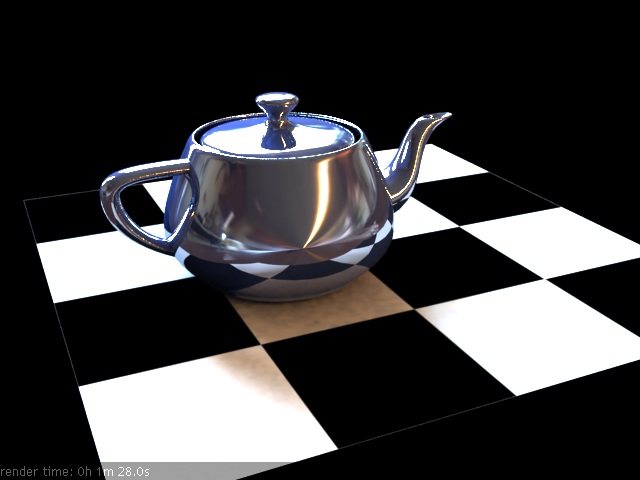
Next, we try a Target Linear light, with v-ray advanced shadows (as always). The light is at a height 3 times the height of the teapot, right above it, pointing down:
Can you see how clear cut the outline is of the shadow from this light on the plane, surrounding the bottom of the pot? We didn’t want a spot, but a light to highlight our scene. I chose this light over a V-Ray one because 3ds Max lights can do something that v-ray lights can’t-project an image.
So check this out… To lighten up a part of my scene without making a spot/enhancement light so obvious, I can simply project an image from the light instead of a color. Simply drag the HDRI material slot over to the Target Spot’s (or any other light with this rollout) Advanced Effects -> Projector Map image button:

So instead of simply shining a white light on the objects in the scene, we’ll use the same HDRI image that is being used for environmental illumination as a utility light, in this case shining right on top of our pot:

Now the shadows are much more manageable, and realistically illuminate our pot. But what happens when we take a light and double (left) or even tripple (right) it’s intensity?


Now this was with the lights directly above the object to be highlighted. What happens when we offset the light a little, yet still target the base of the object? For this final adjustment to the scene, I’ll do a few with a variety of angles and material settings to give an emaple of how realistic these methods are.


Thanks for reading!


")

")
hi freind,
very nice tutorial indeed loved all of it you are a great teacher and well expressed, i’m new to vray and basically i have worked with for a few months now, i’m finiding it hard to my work as i’m doing architectural renderings i’m using vray-1.5-rc3 and wondered if you could help me out here freind
thanks dude.
shivam,
1. You can do a Google search for “Vray tutorials”.
2. V-Ray’s own site: http://www.vray.us/vray_tutorials/
3. http://www.aversis.be/tutorials/vray/index.htm
4. http://www.tutorio.com/vray-tutorials.html
These should be enough to get you started. Don’t forget to send me your renders! pat DOT trainor AT gmail DOT com
:)