I came across this simple trick purely by accident when setting up lighting for a room full of furniture. I ended up supplying indirect/direct lighting for an entire scene with a single light and a plane. The great part of this technique is that it renders really fast.
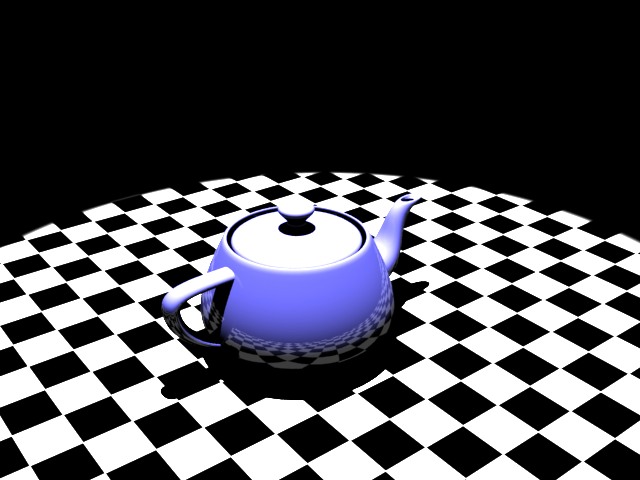
For a test of how this works, setup a standard scene with a V-Ray Plane that has a checker diffuse. Add a teapot to the center of the scene, with any material. Lastly, add a standard Target Spot above the scene. Crank up the intensity multiplier to 3.0. The scene should look a little like this:
To setup a test scene, start with the scene from this tutorial.
I’ve cleaned it up by removing the side glass examples, and leaving just the center one. Also, a V-Ray Sphere is a nice touch:
As discussed in previous posts, 3ds Max is a surface modeler. That means that materials on the surfaces of objects don’t take into account the thickness of the object. V-Ray has a clever tool for this that allows all kinds of fun, realistic effects-Translucency. V-Ray Translucency isn’t documented very well, and there is virtually no information on the internet about it. Today, we’ll take a look at how it works to make realistic glass.
First, lets set up the scene.
-3ds Max 9 SP1
-Floor: V-Ray plane with a Checker diffuse. Tiling 1 x 1 and black & white squares:
I’m mostly concerned with realism in 3D. Making a rendering that people think is a photograph is a goal that makes things harder than they probably should be. While some may say that materials create realism, my vote is that lighting makes a bigger difference.
I’ll start out by saying that I am a V-Ray biggot. Finding a good lighting mechanism for realism has made me feel pretty let down by 3ds Max’s built in lights. My philosophy with regard to scenes is to use as few lights as possible, and obviously as few polys as possible as well. I have contemporaries that fill scenes with lots of lights, all kinds of lights, in an effort to make a scene lit properly. Even after I introduce them to Photometric lights, they can’t break the habit.
This time we’ll be taking a first look at how to introduce exceptional lighting into your scenes with HDRI, or High Dynamic Range Imaging. HDRI is the best way to add lighting to your scene that is as realistic as it gets.
All dynamic range refers to is the fact that even if you are rendering your scene with the widest range of colors, with the best video card, on the best monitor, it will still not have the range of colors and brightness that your eye can detect.
To start, we’ll just insert a plane into the scene and give it a V-Ray material that has its diffuse channel set to a simple checker pattern. I use this pattern because it is the easiest way to see precisely how your objeccts are inter-relating to/with each other and their environment.

Categories
Tag Cloud
Blog RSS
Comments RSS

Void « Default
Life
Earth
Wind
Water
Fire
Light 