
I’ve noticed that folks are still suggesting that doors and windows inside walls still be done with box primitives for walls and boolean subtract those walls with other boxes for windows & doors. With 3ds Max, this is not necessary, nor suggested if you are modeling for speed and flexibility. The solution is to use AEC (Architecture, Engineering and Construction) in 3ds Max.
AEC in 3ds Max is more than a collection of ready-to-go 3d walls, windows, stairs, doors, and other construction components. A few reasons to use them instead of manually boolean-ing include:
1. The objects come ready-to-go. They are already in your stock 3ds Max installation, and they can have all of their attributes adjusted in the modifier tab. Doors can have their hinge, and open angle adjusted, and you can have all the common window types. By trying to make a window, for example, by hand, you’d be manually drawing 50 or more pieces, and you couldn’t change the dimensions of the window without much grief. 3ds Max has them ready to go so you can get back to the creative pieces in your work.
2. 3ds Max comes with all the material templates for each of these objects, and the defaults make sense. So windows come with templates for all the parts of a window with the panes made of glass. If you tried to do all of this by hand, you’d need to create a multi-/sub-object material and painstakingly apply each sub-material to each part of the hand-drawn window-yikes!
3. While non-organic, there are still 3 kinds of doors, 6 kinds of windows, 4 kinds of stairs, railings (why on earth would you want to do these by hand and attempt precision?), and walls with left/center/right justification-and I haven’t even mentioned the foliage!
4. You can use AEC elements like casement windows or doors to create all kinds of architectural components in addition to their normal, obvious uses. You can use a casement window, for example, as a skylight!
And if you’re still convinced that manually boolean-ing is still the way to go, or are just skeptical, I’ve saved the best for last…
5. If you try to make walls and other arhitectural components by hand, and use booleans to put them in walls, you are screwed if you try to move them. If you are working for a client, or if you are a never-satisfied perfectionist, you will tire quickly of having to rebuild the walls, windows and doors and other objects each time things need to be moved even one inch. The good news is that with 3ds Max AEC, when you move awindow, stairs, door, or even a wall, everything moves with it automatically!
That’s right. Draw it once, move it many. Maybe I’ll coin that acronym: DOMM… :)
So let’s do this in 3 easy steps:
1. Create an AEC wall with a door and a window (works the same with any components, but let’s start with a quick one).
2. Apply a standard AEC material from 3ds Max to the wall, door and window.
3. Demonstrate how easy it is to make adjustments to the AEC objects, including their location.
Create AEC Objects
If you’re going to use 3ds Max for real work in architecture, or even just real estate design or trade show booths, you’ll need to change the default grid and vertex spacing in 3ds Max to make drawing a lot easier.
At the top of the 3ds interface, you’ll see a few icons that look like magnets. They are called “snaps”, and your cursor and objects can be made to move in precise ways and directions based on these when you need more control that can be accomplished by hand.
Left-click the one on the left that has a small “3” on it. This turns on what most folks would think of as basic “snapping”. That is, objects are moved in fixed increments (snapped) in one or more axes.
You’ll see that the mouse cursor now has a little box that follows it around, only stopping at fixed points in a jerky kind of way. That is the snapping. The problem with stock 3ds Max is that the default snap distance is 10″ instead of the more logical 12″. When you are roughing out your structures, odds are they will be in feet and inches (or metric for those non-US folks), not 10″ increments.
To fix this, simply right-click on the same icon and a menu comes up that will allow you to adjust what to snap to, and by how much:
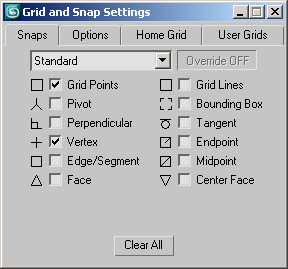
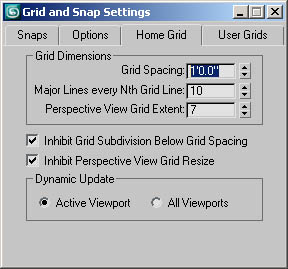
Above, I checked the “Vertex” option, which means it will at least snap to the grid vertices in any 3 axes. The next thing to do is to fix the grid increments. Click the “Home Grid” tab, and change the defaults to the following (or whatever you’d like):
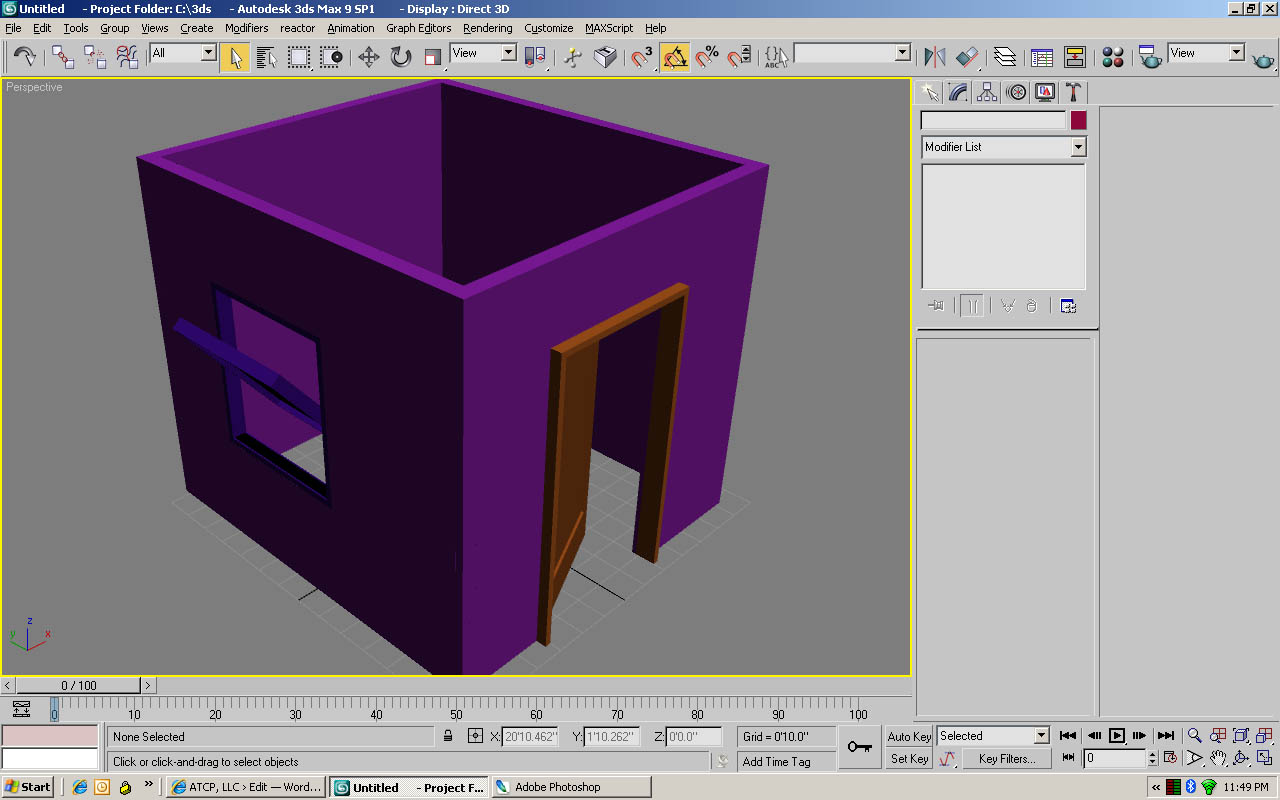
Now we’ll make a room with 4 walls, each 20′ in length. Select: Create -> AEC Objects -> Wall
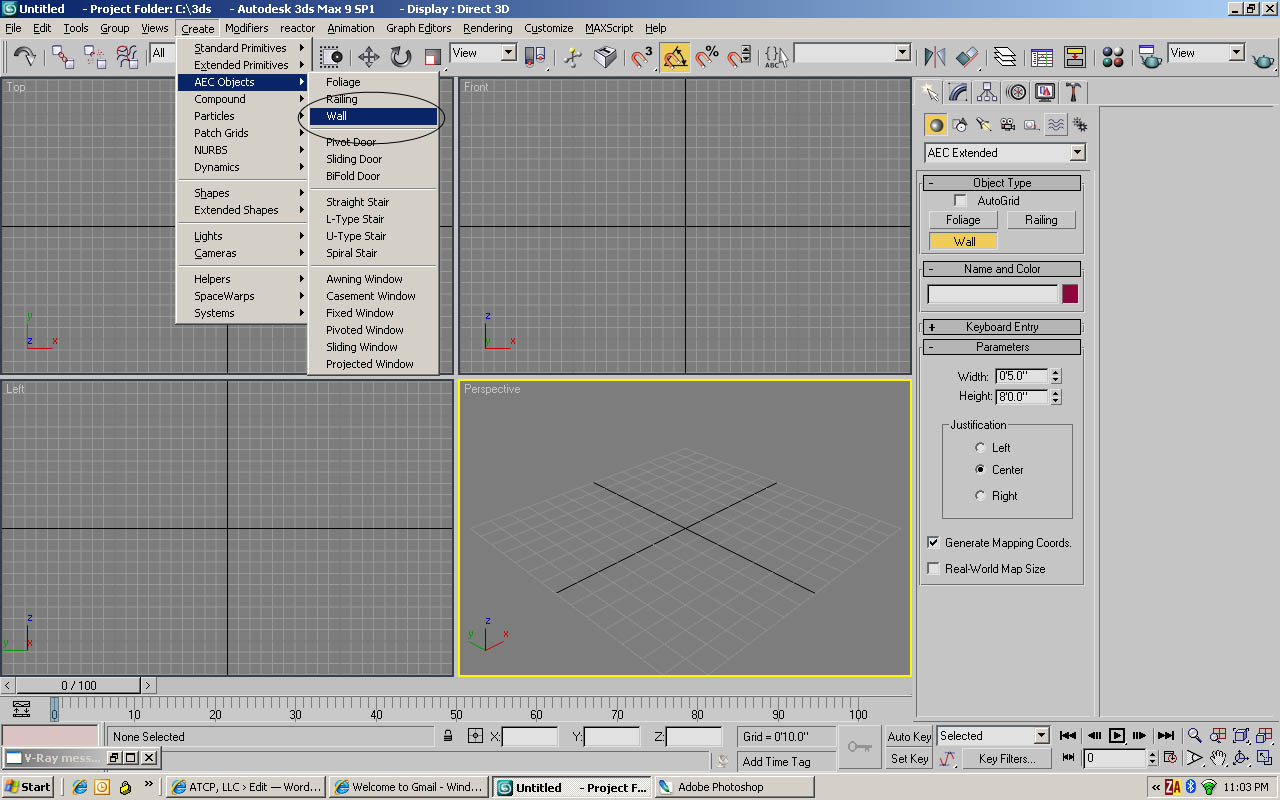
On the right, under Parameters, Select a Width of 5″ and a Height of 10′, Center Justify. Click in the perpective window once to anchor the first wall.
Click again 10′ away, and you’ll see that the wall shows you where it would be if you clicked at that moment. Continue in a square, making the room 10′ on each side (or close). When you click back on the first point, 3ds Max asks if you want to “weld” the points together, effectively closing the room up:
Next we’ll add a door. Select a door via: Create -> AEC Objects -> Pivot Door
In the top viewport, click and drag the mouse right on top of one of the walls, making the door about 3′ wide. Now click the mouse again right where it is (this is for width, which we’ll adjust more precisely in a minute). Finally, move the mouse, looking in the other viewports, until the door is about 8′ tall. In the end, the door should look like this:

The door (PivotDoor01) isn’t linked to the wall yet, so it is just a door sitting in the middle of a solid wall. To link the door to the wall, it is very easy. Select the Select and Link icon way at the top left of the 3ds Max interface.
Now click left on the door and drag the mouse to the wall and release. The door is now linked to the wall. A “hole” has been created that stays the size of the door, even if you move or resize the door!
Now select the door, click the Modify tab on the right, and under Parameters open the door a little. You’ll see that the hole for the door is there automatically!

Now how far would you be now trying to do all this manually? Besides, look at all the great door options available. Let’s add a Pivoted Window the same way the door was added. In the top viewport, click and drag for the width, release and click for depth, and move the mouse to create the height and click. The great thing about AEC objects is that you can get them roughed in, and easily change them later to their precise dimensions in the Modify panel for the object!
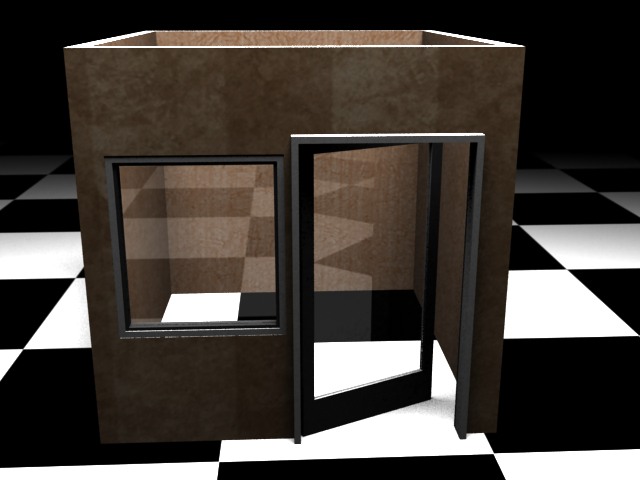
After you link the window to the wall (the same way as the door was done), modify it so that the width is 5″ like the wall. Now do the same for the door. The result is:
Now it is time to apply materials to the wall, door and window so we can render the room.
Apply Materials
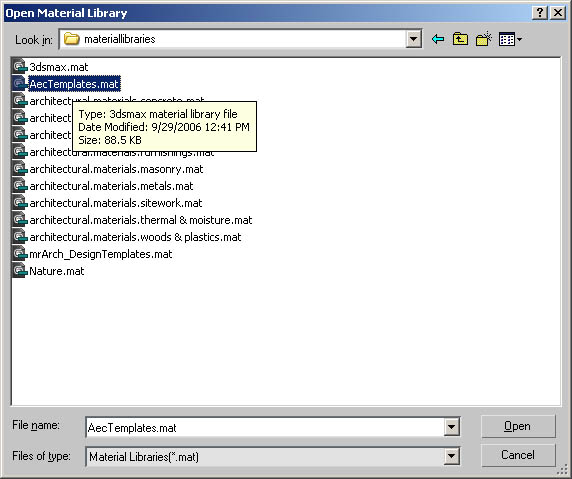
Select the walls. In the Material Editor, select a sample slot, and select Material -> Get Material. In the Material/Map Browser, under Browse From:, select Mtl Library. Under File, click Open…
Navigate to your 3ds Max installation directory, and into the materiallibraries directory. Click to choose AecTemplates.mat:
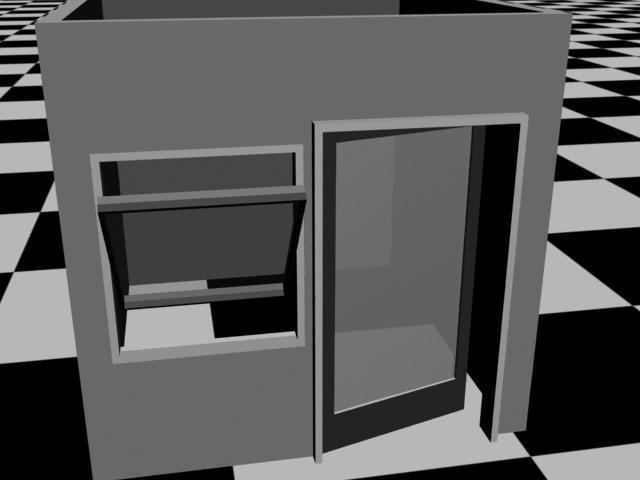
Apply this material to the wall. As you see, there are template materials for doors, railings, stairs and windows, too. Select the door and window next in the same fashion, applying the appropriate template to each.
Here are the components with the default material templates, which are by default pretty logical. For example, the material where the windows would be are semi-transparent:
The materials for each are already labelled intuitively as well:
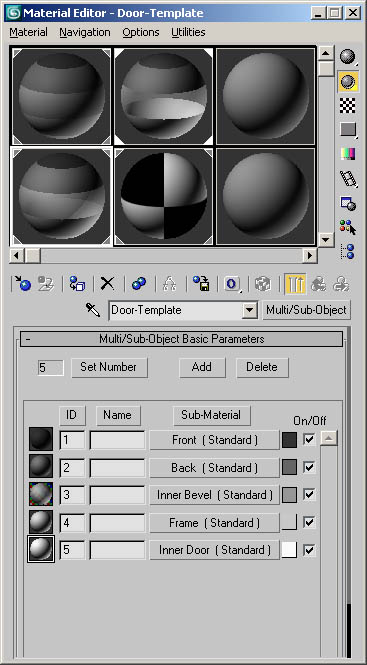
Create a clear glass material and apply it to the door’s Inner Bevel sub-material:
Make Changes
Now to show the real power ot AEC. Take any AEC object and move it, and everything moves with it logically, automatically. Try moving the window. You can even move it to a different wall in the room and the “hole” moves with it.
Better still, when you make a copy of an AEC object in the room, like the window we made, the link created is preserved. Just copy it and you’re finished!
You can make any changes to any AEC object dynamically without having to mess with geometry-even the walls themselves.
So the next time you need to create some architectural objects, consider saving yourself a ton of time by not building with booleans!


 of Engagements")